Hello everyone! It’s been a while since I last wrote an article, but I’m excited to get back into it. Last week, I attended an EXPO event at my workplace where many teams showcased their impressive API implementations.
One thing that particularly caught my attention was the API-First Approach. Intrigued by this concept, I decided to dive deeper and get some hands-on experience with it.
In this article, I’ll share how I learned and experimented with the API-First Approach using Spring Boot.
What is API First?
The API-first approach means starting with creating the APIs (which are like connectors that let different parts of software talk to each other) before doing anything else in the software development process. This way, APIs are considered the main building blocks. In organizations using this approach, APIs are made first and then other parts of the software are built around them. This helps teams create applications that can easily work with both internal and external services using these APIs.
The more cool stuffs can be found here:
https://swagger.io/resources/articles/adopting-an-api-first-approach
https://www.postman.com/api-first/#:~:text=API%2Dfirst%2C%20also%20called%20the,of%20treating%20them%20as%20afterthoughts.
So yeah, Let’s jump in to the development
Prerequisites
1. Java 22 Installed
2. IDE (Ex. IntelliJ IDEA)
Setting Up the Project
Now we are ready to develop our application using API First Approach.
Implementation of the API-First Approach
1. Creating the API Contract
We’ll use a Employee database demo REST API to illustrate an API-First approach workflow.
That API allows following operations:
- Get list of employees
- Get a single employee
- Get list employees by status
- Add a new employee
- Delete an existing employee
- Update an exiting employee
Now, we can create the OAS API Specification file.
2. Top-Level Context of the API
Let’s start by defining the top-level context of the API. To do that, first we need to create api.yaml file in the resources/static folder of our project. And the add the following yaml-code:
Let’s explore the components of the files individually:
Meta Data of the File

- openapi — The version of OAS used.
- title — Short title for the API.
- description — Description of the API responsibilities.
- version — The current version of the API, for instance, 1.0.0.
- servers — The available machines where the client can access the API.
- tags — A set of unique tags to group API operations in sub-sets.
Define Endpoints
Next, let’s create the API endpoints we discussed earlier. To do this, add the following content at the root level of the YAML file:
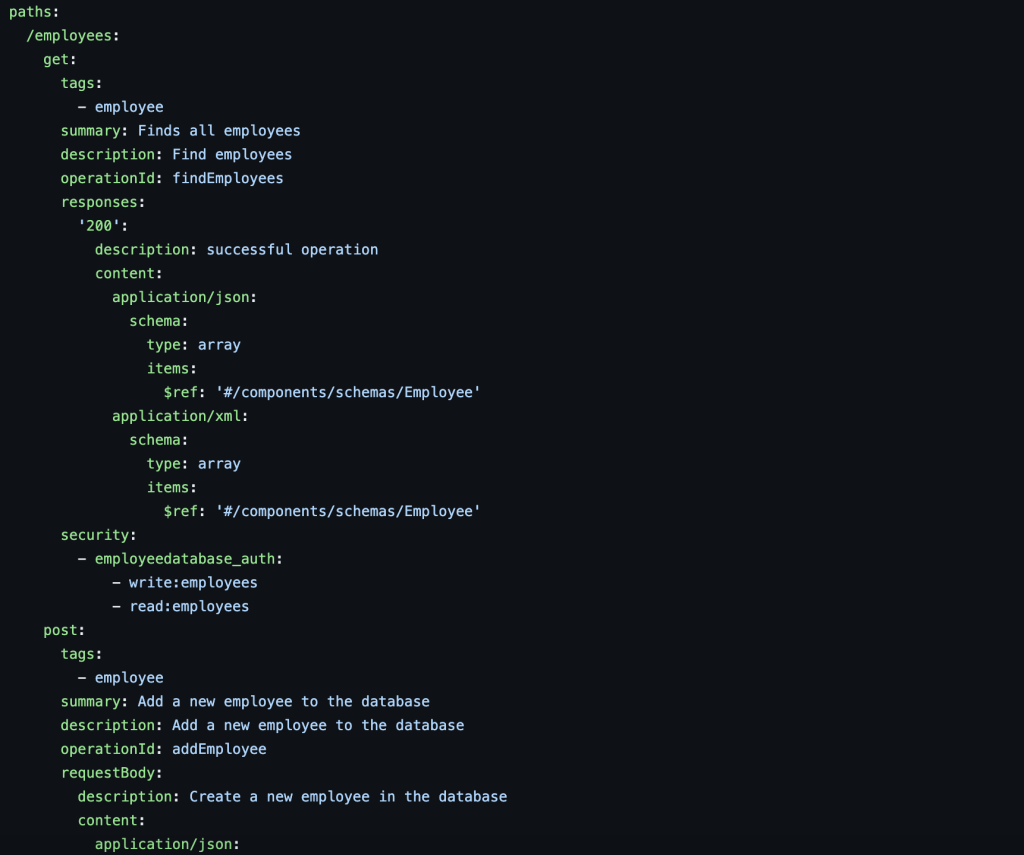
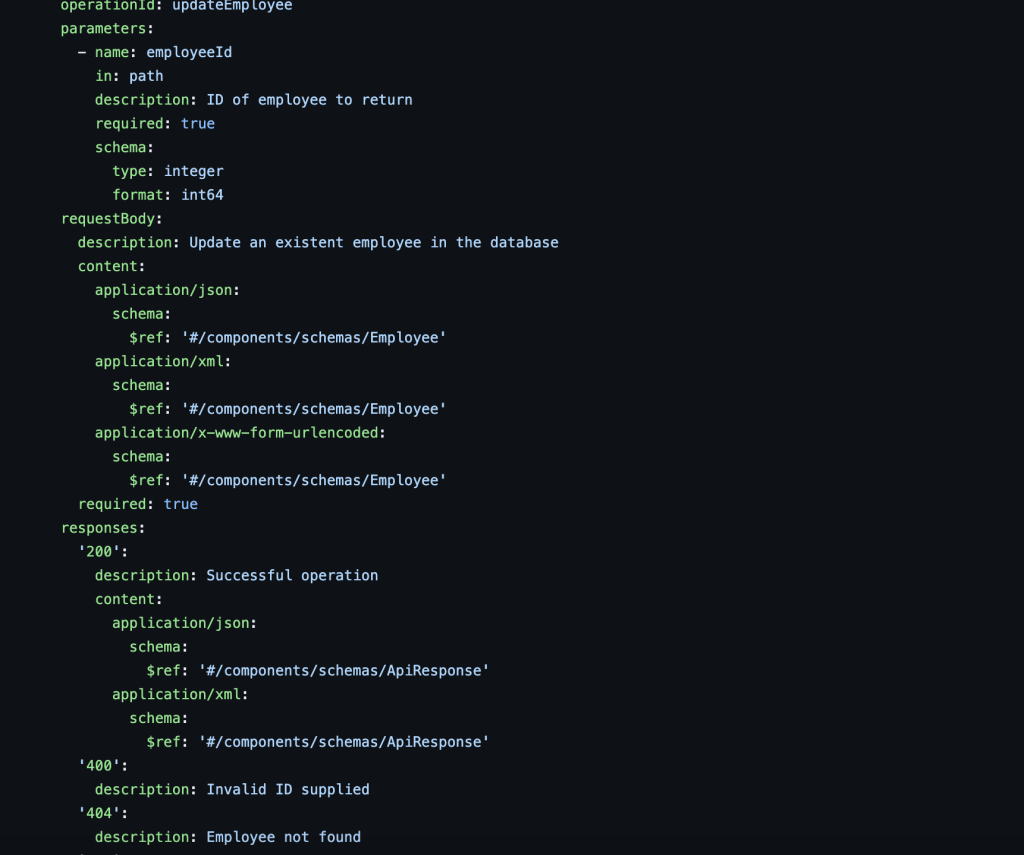
The content above includes many details. Let’s break it down by looking at each keyword individually:
- paths: Specifies API resources such as “/employees” and “/employees/{employeeId}”. For each resource, we define the available “get” and “post” methods.
- tags: Identifies the group an endpoint belongs to. The tag name should match the one mentioned earlier.
- summary: Provides a brief overview of what the endpoint does.
- description: Gives a detailed explanation of how the endpoint works.
- operationId: A unique identifier for the specific operation.
- requestBody: Describes the payload in the request, including its content and whether it’s required. The content schema will be detailed in the next section.
- responses: Lists all possible response codes. Each response code object includes a description and content keywords. The content schema will be defined in the upcoming section.
- content: Indicates the HTTP Content-Type of the message being exchanged.
Defining the Data Model
Now, let’s create the data model objects for our API: the request and response bodies, and the error messages. To do this, add the following structure at the root level of the api.yaml file:
After writing all the components, our final api.yaml file will look like below:
Now we are done with our core implementation of the API First Approach. Let’s add some dependencies which will generate the files using the api.yaml file.
Add the following in the dependencies section
<dependency>
  <groupId>io.swagger.codegen.v3</groupId>
  <artifactId>swagger-codegen-maven-plugin</artifactId>
  <version>3.0.56</version>
</dependency>
And add this in the plugins section
<plugin>
    <groupId>org.openapitools</groupId>
    <artifactId>openapi-generator-maven-plugin</artifactId>
    <!-- RELEASE_VERSION -->
    <version>7.5.0</version>
    <!-- /RELEASE_VERSION -->
    <executions>
        <execution>
            <goals>
                <goal>generate</goal>
            </goals>
            <configuration>
                <inputSpec>${project.basedir}/src/main/resources/static/api.yaml</inputSpec>
                <generatorName>spring</generatorName>


                <!-- Name of the package where handler, models and invokers should be generated -->
                <packageName>com.sharaafnazeer.apifirstspringboot</packageName>
                <apiPackage>com.sharaafnazeer.apifirstspringboot.api</apiPackage>
                <modelPackage>com.sharaafnazeer.apifirstspringboot.model</modelPackage>
                <invokerPackage>com.sharaafnazeer.apifirstspringboot.handler</invokerPackage>
                <!--                            <configHelp>true</configHelp>-->
                <library>spring-boot</library>

                <!-- This hack will help to ignore the test files during generation !-->
                <ignoreFileOverride>${project.basedir}/.openapi-generator-ignore</ignoreFileOverride>

                <configOptions>
                    <library>spring-boot</library>
                    <!-- Name of the source folder path under 'generated' folder -->
                    <sourceFolder>src/main/java</sourceFolder>
                    <!-- Set to true if you want to generate a delegate class, which
                        will be injected in controller -->
                    <delegatePattern>false</delegatePattern>
                    <!-- If set to true, generates only API controller interface and
                        you need to provide the implementation -->
                    <interfaceOnly>true</interfaceOnly>
                    <useSpringBoot3>true</useSpringBoot3>
                    <openApiNullable>false</openApiNullable>
                    <useJakartaEe>true</useJakartaEe>
                    <serializableModel>true</serializableModel>
                    <useSpringController>true</useSpringController>

                    <!-- Not affective at the moment. still creates the API test files which will fail while running !-->
                    <generateApiTests>false</generateApiTests>


                </configOptions>
            </configuration>
        </execution>
    </executions>
</plugin>
Execute the Maven build using the command ./mvnw clean install. This will trigger the OpenAPI Codegen plugin during the generate goal, resulting in the creation of server stub classes (controllers, models, configurations, and the Spring Boot main application) in the directory specified in the plugin configuration.
In our case it will the following:
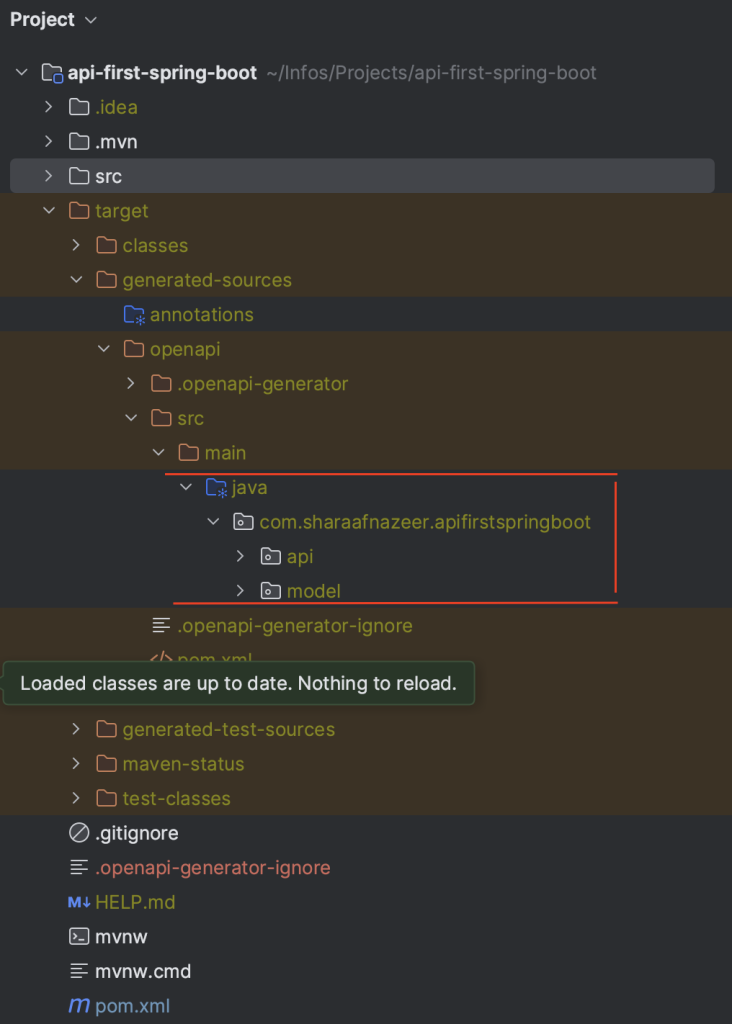
Now we can see the generated files in the folders. Lets explore some generated files.
Generated Files
Data Model:
Employee API Interface:
Un-expected Errors
Even though the files got generated successfully, I was not able to run the Spring Boot application successfully. Because of the following error.
Open API generator generates unit tests for the generated classes, and the dependencies were not identified properly. I did some workaround to overcome this issue as below,
Making generateApiTests as false did not help and it showed the same error.
So, I went through some other forums and found a workaround which will help to overcome this issue.
I created a file named .openapi-generator-ignore in the root directory of the project and added the following on it,
And this file has been added in the configuration section of Open API in the pom.xml
So, finally the complete pom.xml file looks like below.
Consume the Generated Files
Now let’s move on and see how we can integrate the generated files.
1. Create Employee controller as below, implement the EmployeeApi interface generated by Open API generator and annotate it with @RestController
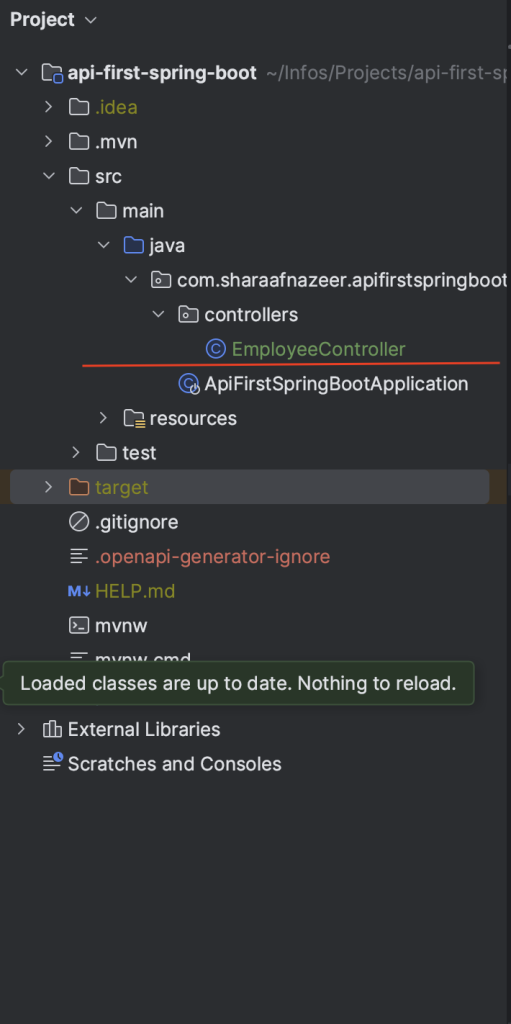
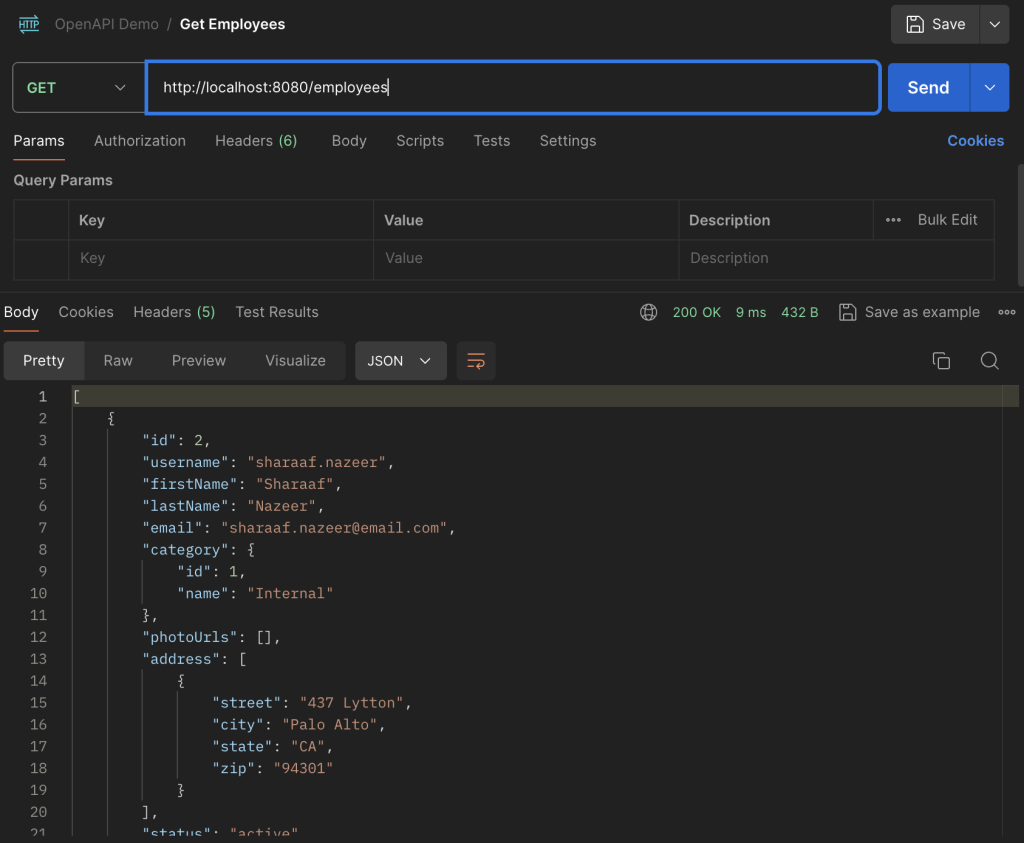
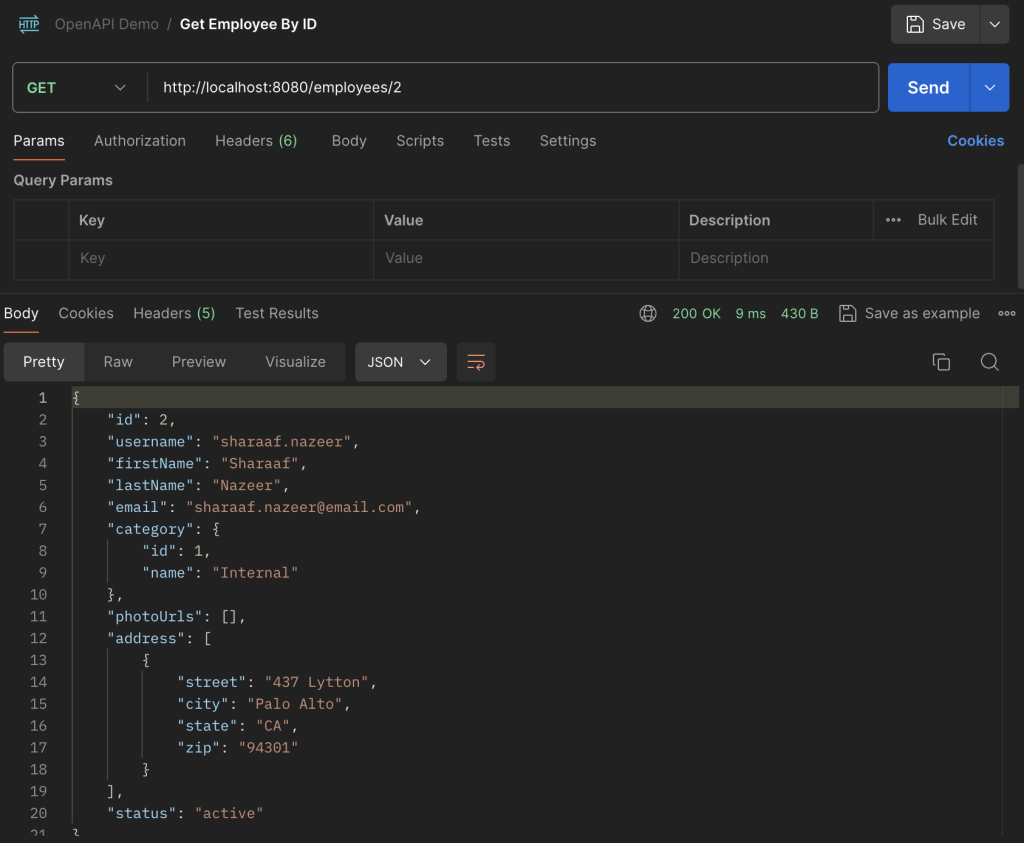
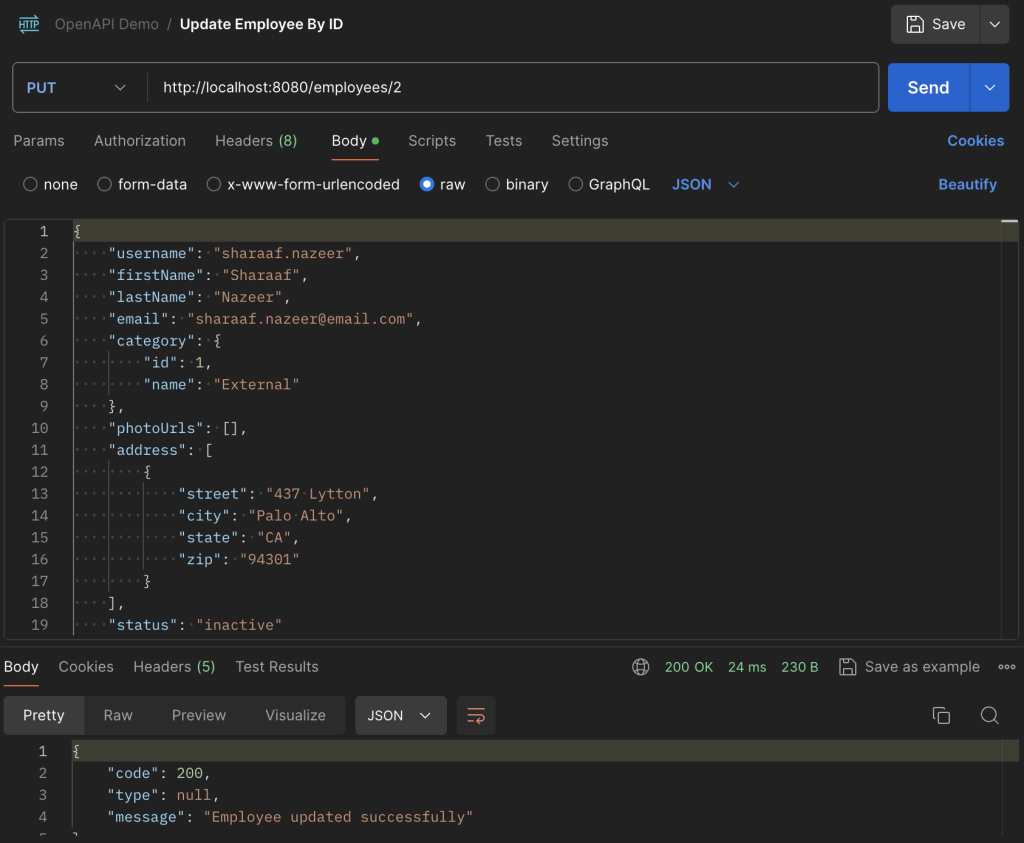
Now we are done with our implementation, Lets test the APIs that we developed.
1. Add Employee
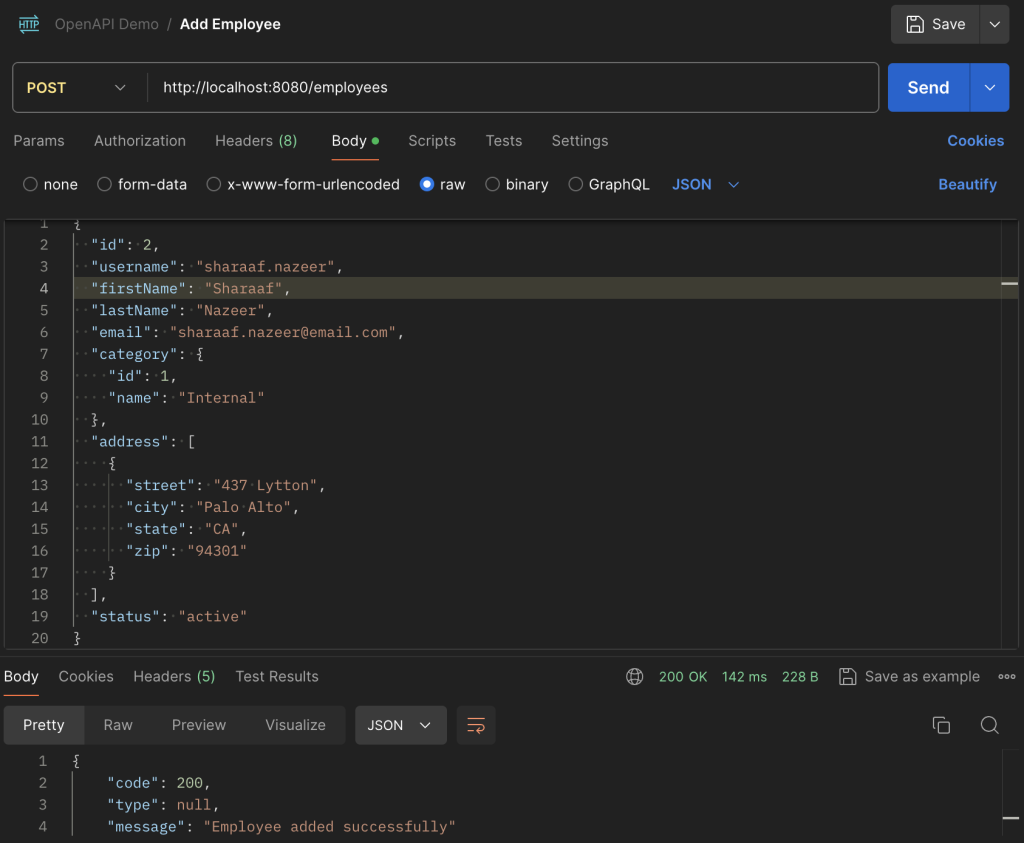
2. Get Employees
3. Get Employee by ID
4. Update Employee
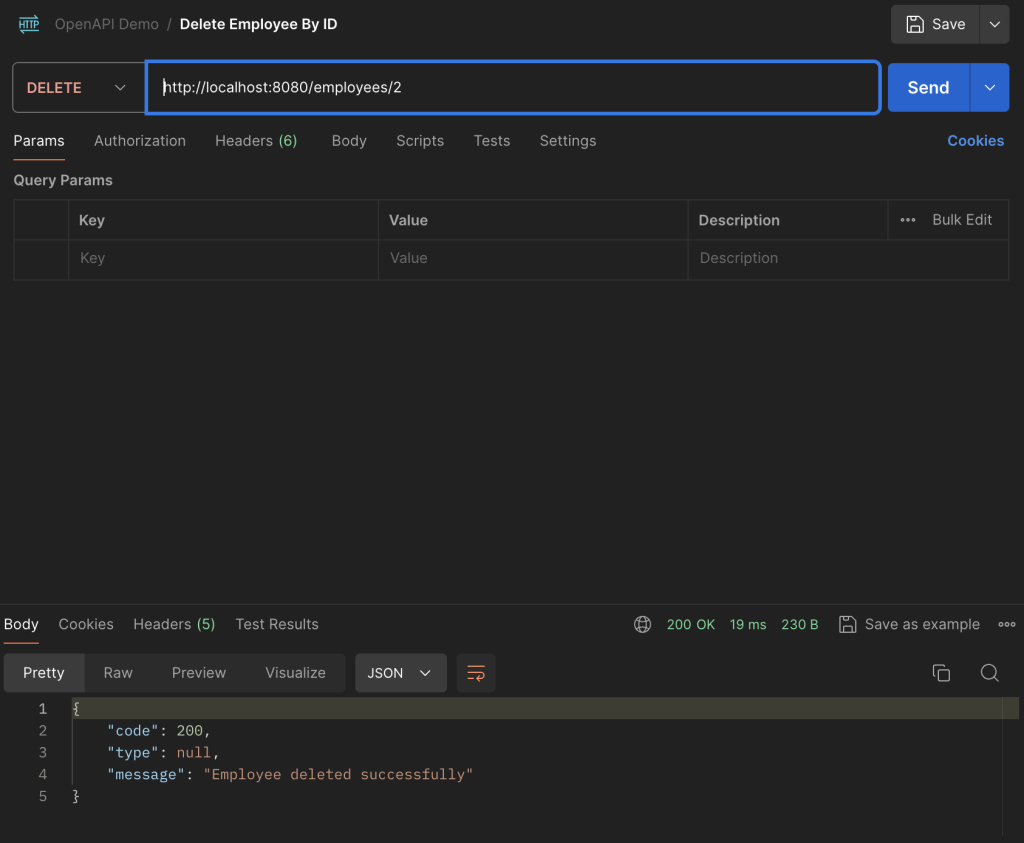
5. Delete Employee
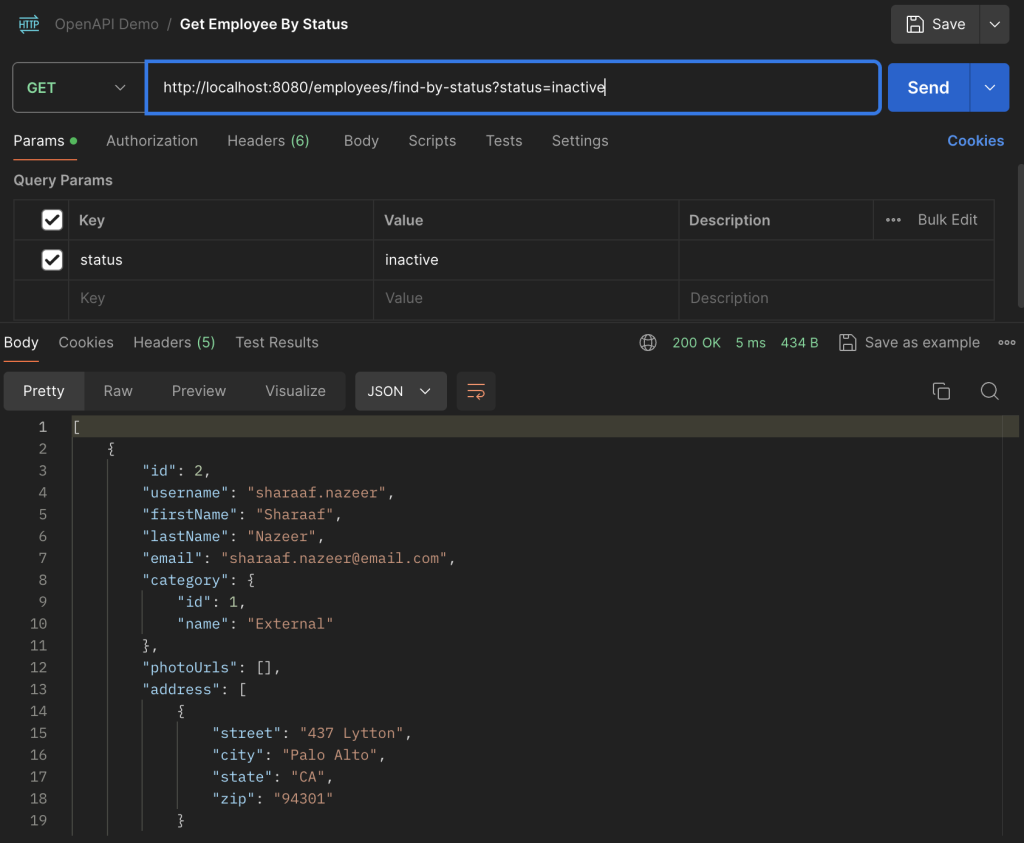
6. Get Employee By Status
AND THAT’S IT!!!
In this article, we’ve explored API-First Development with Spring Boot and OAS, highlighting its significant advantages for agile software development teams. The primary benefit of an API-First approach is enhanced agility and minimized wasted development time when creating APIs. This methodology allows for rapid drafting, iterative changes, and quicker feedback on the design.
Another key advantage of the API-First approach is that it enables stakeholders to work independently of the development process. Once the initial API design document is created, QAs, writers, managers, and developers can proceed with their tasks concurrently, promoting efficiency and collaboration.